Dependency Injection in Spring
Join the DZone community and get the full member experience.
Join For FreeSpring is a Dependency Injection (DI) framework used in a majority of enterprise Java applications, including web services, microservices, and data-driven systems. The power of Spring stems from its ability to perform a vast array of tasks — such as DI, database abstraction, and web-endpoint abstraction— with minimal code. In many cases, we are only required to write a small amount of code with the help of a few, well-place annotations to configure a complex application.
While this simplicity and abstraction have been essential to Spring's widespread adoption, we often overlook its fundamentals and lack an intuitive understanding of the concepts that underpin the framework. This muddled view can lead to poor design, increase implementation time, and frustrated debugging, all of which hinder the quality of our applications. To remedy this, we need to break down the complexities of Spring into their atomic pieces and build our understanding from these central components.
In this article, we will delve into the concepts behind the Spring Framework, including Inversion of Control (IoC), DI, and the ApplicationContext interface. Leveraging these fundamentals, we will look at how to create applications with Spring, using both Java-based and eXtensible Markup Language (XML)-based configurations. Lastly, we will explore some of the common problems encountered while creating a Spring application, including bean uniqueness and circular dependencies.
The interested reader can find the source code used for this article on GitHub.
Inversion of Control
Prior to understanding DI, we must first understand the typical flow used to instantiate an object. Outside of a DI framework, we instantiate an object by using the new keyword. For example, given a Car class, we can instantiate an object, car, using the following:
Car car = new Car();
We can add complexity to our Car class by defining an Engine interface and including an Engine object as a field within the Car class:
xxxxxxxxxx
public interface Engine {
public void turnOn();
}
public class Car {
private Engine engine;
public Car() {}
public void start() {
engine.turnOn();
}
}
Calling our start method for our Car class would result in a NullPointerException (NPE), though, since we have failed to initialize the engine field within the Car constructor. The most basic approach to resolving this problem is to make a decision about which Engine implementation should be used within the Car constructor and directly assign that implementation to the engine field.
For example, suppose that we create the following Engine implementations:
xxxxxxxxxx
public class CombustionEngine implements Engine {
public void turnOn() {
System.out.println("Started combustion engine");
}
}
public class ElectricEngine implements Engine {
public void turnOn() {
System.out.println("Started electric engine");
}
}
If we decide to use the CombustionEngine implementation, we must change our Car constructor to assign our engine field with an instantiated CombusionEngine object:
xxxxxxxxxx
public class Car {
private Engine engine;
public Car() {
this.engine = new CombustionEngine();
}
public void start() {
engine.turnOn();
}
}
If we execute our start method on our Car object, we see the following output:
xxxxxxxxxx
Started combustion engine
While we have resolved the NPE error, we have introduced another issue. We have made a good design decision by abstracting the details of an engine behind the Engine interface, but we have lost the flexibility of that interface by explicitly stating that all Car objects will have a CombustionEngine. If we want to create a different Car object that has an ElectricEngine, we would have to make a change to our design. One approach is to create two separate classes, where each constructor assigns the engine field to one of the two Engine implementations. For example:
xxxxxxxxxx
public class CombustionCar {
private Engine engine;
public CombustionCar() {
this.engine = new CombustionEngine();
}
public void start() {
engine.turnOn();
}
}
public class ElectricCar {
private Engine engine;
public ElectricCar() {
this.engine = new ElectricEngine();
}
public void start() {
engine.turnOn();
}
}
While this does resolve our Engine issue, it is a poor design choice for two reasons:
- We have duplicated the
startmethod in both classes. - We are required to create a new class for each new
Engineimplementation.
The latter problem is particularly difficult to solve and worsens as the number of Engine implementations grows. Additionally, we do not control the Engine implementations, and there is no restriction on another developer creating his or her own implementation.
In this case, that developer would then be required to create another Car implementation to support his or her particular Engine. As we will see shortly, we must solve it by changing our assumptions, which will remove the problem altogether.
The former problem can be easily solved by creating a Car base class and moving the common code into that base class. Since the engine field is private, we are forced to either relax the visibility of the engine field or change the Car base class constructor to accept an Engine object and make the assignment within the Car base class constructor. Since relaxing the visibility of the engine field could open the engine field up to manipulation by outside classes (such as a Car implementation from another developer), we will use the constructor-based solution:
xxxxxxxxxx
public abstract class Car {
private Engine engine;
public Car(Engine engine) {
this.engine = engine;
}
public void start() {
engine.turnOn();
}
}
public class CombustionCar extends Car {
public CombustionCar() {
super(new CombustionEngine());
}
}
public class ElectricCar extends Car {
public ElectricCar() {
super(new ElectricEngine());
}
}
Using this approach, we successfully removed the duplicate code, but this solution begs the question: Why not just go back to our original Car class and allow the client instantiating Car objects to pass in the Engine implementation as a constructor argument? This approach would also remove the need to create a new Car implementation for each Engine implementation, since the Car class only depends on the Engine interface and has no knowledge of any particular Engine implementation.
Following this approach, we can change our Car implementation to:
xxxxxxxxxx
public class Car {
private Engine engine;
public Car(Engine engine) {
this.engine = engine;
}
public void start() {
engine.turnOn();
}
}
By adding the Engine constructor argument, we have changed the decision of which Engine implementation to use from the Car class itself — which originally decided on a CombustionEngine— to the client that instantiates the Car class. This reversal of the decision process is called the IoC principle. Instead of the Car class itself controlling which Engine implementation is used, now the client controls which implementation is used.
For example, suppose we create the following snippet:
x
CombustionEngine combustionEngine = new CombustionEngine();
Car combustionCar = new Car(combustionEngine);
combustionCar.start();
ElectricEngine electricEngine = new ElectricEngine();
Car electricCar = new Car(electricEngine);
electricCar.start();
If we execute this snippet, we receive the following output:
xxxxxxxxxx
Started combustion engine
Started eletric engine
From this example, it is clear that the client that instantiates the Car class has control over the Engine implementation used and depending on which implementation is passed to the Car constructor, the behavior of the Car object changes drastically.
An additional benefit of IoC is that it also makes testing the Car class much easier. Since the Engine implementation can be supplied by the client, we can supply a mock Engine object within our testing framework that can be used to ensure that specific methods are called on the Engine implementation when actions on the Car are performed.
Dependency Injection
Although we have solved the issue of deciding who controls what Engine implementation to use, we have also altered the steps required to instantiate a Car object. Originally, no arguments were required to instantiate a Car, since the Car constructor handled the creation of the Engine object. Using the IoC approach, we require that a fully-constructed Engine object be passed to the Car constructor before a Car object can be instantiated. In short, originally, we instantiated the Car object first and then instantiated the Engine object; but, using IoC, we first instantiate the Engine object and then the Car object.
Therefore, we have created a dependency in the construction process. This dependency differs from the compile-time dependency that the Car class has on the Engine interface, though. Instead, we have introduced a run-time dependency. Before a Car object can be instantiated at run-time, an Engine object must be instantiated first.
Dependency Trees
We can formalize this process by creating a graph of these dependencies, where the nodes of the graph represent an object and the edges represent the dependency relationship (with the arrow pointing to the depended-upon object). This graph is called a dependency tree — or dependency graph. In the case of our Car class, the dependency tree is simple:

This dependency tree can become more complex if the terminal nodes of the tree have additional dependencies of their own. For example, if the CombustionEngine had other dependencies, we would be required to first satisfy the dependencies of the CombustionEngine before we could instantiate a CombustionEngine object to be passed to our Car constructor during instantiation of the Car object:
xxxxxxxxxx
public class Camshaft {}
public class Crankshaft {}
public class CombustionEngine implements Engine {
private Camshaft camshaft;
private Crankshaft crankshaft;
public CombustionEngine(Camshaft camshaft, Crankshaft crankshaft) {
this.camshaft = camshaft;
this.crankshaft = crankshaft;
}
public void turnOn() {
System.out.println("Started combustion engine");
}
}
Given our updated CombustionEngine, our dependency tree would resemble the following:

Dependency Injection Frameworks
This complexity would continue to grow as we continue to introduce more dependencies. To resolve this complication, we need to abstract the creation process for an object based on its dependency tree. This process is what constitutes a DI framework.
In general, we can reduce this process into three parts:
- Declare what dependencies are required for a given object.
- Register classes that are eligible to create these dependent objects.
- Provide a mechanism for creating objects, using the information in (1) and (2).
Either an explicit declaration of dependencies or introspection of the constructor for a class satisfies (1). With reflection, we can know that the Car object requires an Engine object in the same way we discovered this in the previous sections: We look at the constructor of the Car class — from which a Car object would be instantiated — and see that it requires an Engine argument.
Since we know that a Car object requires an Engine object, we must declare at least one implementation of the Engine class to be eligible to be used as a dependency. For example, if we declare that the CombustionEngine is eligible to be used as a dependency, then we can create a CombustionEngine object, which satisfies the Engine requirement for the Car object.
This process is recursive, though. Since we declared the CombustionEngine class to be eligible as a dependency, we would need to know how to create an object of the CombustionEngine class. This necessitates that we introspect the CombustionEngine constructor — as we did in (1) — which tells us that in order to create a CombustionEngine object, we require Camshaft and Crankshaft objects. Thus, we would now require that the Camshaft and Crankshaft classes be declared as eligible to be used as dependencies before we could create a Car object.
Lastly, (3) we take the previous two requirements and puts them into action. In practice, this means that when an object is requested, such as a Car object, we must walk the dependency tree and check that there is at least one eligible class for all dependencies. For example, declaring the CombustionEngine class as eligible satisfies the Engine node requirement. If such a dependency exists, we instantiate the dependency and then move to the next node.
If there is more than one class that satisfies a required dependency, then we must explicitly state which of the possibilities should be selected. We will cover how Spring does this later. Similarly, if the dependency graph contains a cycle, where an object of class A is required to instantiate an object of class B, but class B requires an object of class A, then we must throw an error. We will also see later how Spring handles cyclical dependencies.

Once we are sure that all dependencies are satisfied, we can then construct the dependencies, starting with the terminal nodes. In the case of our Car object, we first instantiate Camshaft and Crankshaft objects — since those objects do not have dependencies — and then pass those objects to the CombustionEngine constructor to instantiate a CombunstionEngine object. Finally, we pass the CombustionEngine object to the Car constructor to instantiate our desired Car object.
With the fundamentals of DI understood, we can now move on to how Spring performs DI.
Dependency Injection in Spring
At its core, Spring is a DI framework that facilitates the translation of DI configurations into Java applications. While often considered hair-splitting, it is essential that a distinction is made between a library and a framework. A library is a set of standalone code that is used within another set of code. For example, a math library may provide classes and methods that allow us to perform complex operations. These classes and methods are imported by our application and are adapted within our code to make up our application.
A framework, on the other hand, can be thought of as a skeleton in which our code slots into to create an application. Many frameworks stub out application-specific portions and require that we as developers provide code that fits into the framework. In practice, this means writing implementations of interfaces and then registering the implementations with the framework.

ApplicationContext
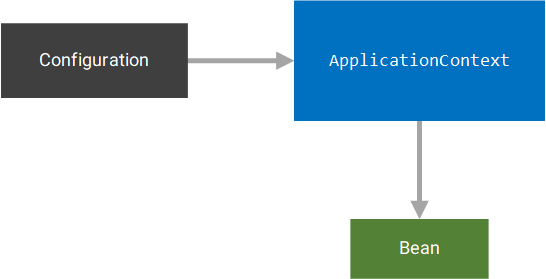
In the case of Spring, the framework centers around the ApplicationContext interface. This interface represents a context that is responsible for implementing the three DI responsibilities outlined in the previous section. Thus, we register eligible classes with the ApplicationContext through either Java-based or XML-based configurations and request the creation of objects, called beans, from the ApplicationContext. The ApplicationContext then builds a dependency tree and traverses it to create the desired bean.
The logic contained in the ApplicationContext is often referred to as the Spring Container. In general, a Spring application can have more than one ApplicationContext, and each ApplicationContext can have separate configurations. For example, one ApplicationContext may be configured to use the CombustionEngine, as its Engine implementation while another container may be configured to use the ElectricEngine as its implementation.
Throughout this article, we will focus on a single ApplicationContext per application, but the concepts described below apply even when an application has multiple ApplicationContext instances.
Java-Based Configuration
Spring provides two Java-based mechanisms for configuration: (1) basic and (2) automated.
Basic Java-Based Configuration
In order to simplify the configuration process, Spring allows developers to provide DI configurations using Java code. At its core, two main annotations make up this process:
@Configuration: Defines a configuration class.@Bean: Declares that the return value of the annotated method should be used as a dependency.
For example, given the Car, CombustionEngine, Camshaft, and Crankshaft classes we previously defined, we can create a configuration that resembles the following:
xxxxxxxxxx
public class AnnotationConfig {
public Car car(Engine engine) {
return new Car(engine);
}
public Engine engine(Camshaft camshaft, Crankshaft crankshaft) {
return new CombustionEngine(camshaft, crankshaft);
}
public Camshaft camshaft() {
return new Camshaft();
}
public Crankshaft crankshaft() {
return new Crankshaft();
}
}
Note that the methods annotated with @Bean follow the convention that the method name matches the return value type but in lower-camelcase. For example, the engine method returns an Engine object. This convention is not required, but it should be followed unless there is a specific, overriding reason.
Additionally, the method parameters that we have specified inform Spring to provide the @Bean method with objects that satisfy those parameters. For example, the Engine parameter for the car method instructs Spring to inject the Engine object that will be created by the framework during the DI process. Inside the car method, we simply pass that Engine object to the Car constructor to create a Car object.
We can then instantiate an ApplicationContext object— AnnotationConfigApplicationContext —that consumes our Java configuration, request a bean —a Car object, in our case — from the ApplicationContext object, and execute the start method on the created Car bean:
xxxxxxxxxx
ApplicationContext context =
new AnnotationConfigApplicationContext(AnnotationConfig.class);
Car car = context.getBean(Car.class);
car.start();
Executing this snippet results in the following (the debug statements generated by Spring have been removed for brevity):
xxxxxxxxxx
Started combustion engine
This output reflects the fact that we have instructed Spring to use our CombustionEngine object wherever an Engine object is requested. If, on the other hand, Spring were unable to satisfy all of the required dependencies, the framework would throw an error. For example, suppose we remove the Camshaft @Bean definition from our configuration:
xxxxxxxxxx
public class AnnotationConfig {
public Car car(Engine engine) {
return new Car(engine);
}
public Engine engine(Camshaft camshaft, Crankshaft crankshaft) {
return new CombustionEngine(camshaft, crankshaft);
}
// ...Missing Camshaft bean...
public Crankshaft crankshaft() {
return new Crankshaft();
}
}
If we execute the same snippet as before, we see the following error (the entire stacktrace has been hidden for brevity):
xxxxxxxxxx
Exception in thread "main" org.springframework.beans.factory.UnsatisfiedDependencyException: Error creating bean with name 'car' defined in com.dzone.albanoj2.spring.di.config.AnnotationConfig: Unsatisfied dependency expressed through method 'car' parameter 0; nested exception is org.springframework.beans.factory.UnsatisfiedDependencyException: Error creating bean with name 'engine' defined in com.dzone.albanoj2.spring.di.config.AnnotationConfig: Unsatisfied dependency expressed through method 'engine' parameter 0; nested exception is org.springframework.beans.factory.NoSuchBeanDefinitionException: No qualifying bean of type 'com.dzone.albanoj2.spring.di.domain.Camshaft' available: expected at least 1 bean which qualifies as autowire candidate. Dependency annotations: {}
This error explains what we expected to occur: Spring failed to create our desired Car bean because it could not create the required Engine bean because at least one bean satisfying the Camshaft requirement could not be found.
While the combination of the @Configuration and @Bean annotations provide enough information to Spring to perform dependency injection, we are still forced to manually define every bean that will be injected and explicitly state their dependencies—twice in fact: Once in the @Bean method signature and again in the constructor of the bean. To reduce the overhead necessary for configuring the DI framework, Spring provides annotations that automatically introspect eligible classes.
Automated Java-Based Configuration
To support automated Java-based configuration, Spring provides additional annotations. While there are numerous, rich annotations that we can use, there are three foundational annotations:
@Component: Registers as a class as being managed by Spring.@Autowired: Instructs Spring that a dependency should be injected.@ComponentScan: Instructs Spring where to look for classes annotated with@Component
Although the @Component annotation does mark a class as eligible to be used as a dependency, it brings with it additional features. In our description of a DI framework, our Car object was not itself used as a dependency. As a result, we were not required to register it as an eligible class. In the @Configuration example above, however, we created a @Bean method that returned a Car object because we needed to instruct Spring how to create a Car object when one was requested.
In a similar manner, we have to instruct Spring that — even though no Car object is being injected into another object as a dependency — that the Car class can be managed by Spring. Thus, we will also annotate our Car class with @Component.
Constructor Injection
The second annotation, @Autowired, is used to instruct Spring that we intend to have a dependency injected — termed autowired in the Spring lexicon — at the annotated location. For example, in the Car constructor, we expect to have an Engine object injected, and therefore, we will annotate the Car constructor with @Autowired. Applying the @Component and @Autowired annotations to our Car class, we end up with the following definition for Car:
xxxxxxxxxx
public class Car {
private Engine engine;
public Car(Engine engine) {
this.engine = engine;
}
public void start() {
engine.turnOn();
}
}
We can repeat this process for our other classes as well:
xxxxxxxxxx
public class Camshaft {}
public class Crankshaft {}
public class CombustionEngine implements Engine {
private Camshaft camshaft;
private Crankshaft crankshaft;
public CombustionEngine(Camshaft camshaft, Crankshaft crankshaft) {
this.camshaft = camshaft;
this.crankshaft = crankshaft;
}
public void turnOn() {
System.out.println("Started combustion engine");
}
}
With our classes properly annotated, the last step is to create a @Configuration class to instruct Spring how to autowire our application. In the case of a basic Java-based configuration, we explicitly instructed Spring how to create each bean using the @Bean annotation, but in the automated approach, we have already provided sufficient information — through the @Component and @Autowired annotations — on how to create all of the required beans. The only information missing is where Spring should look to find our @Component classes.
Java applications can contain a nearly-endless number of classes in any arbitrary package structure. Searching the entire classpath for classes annotated with @Component would be an infeasible task for Spring, so instead, Spring requires that we tell it explicitly where to search for eligible classes annotated with @Component. To do this, we use the @ComponentScan annotation and apply it to a class annotated with @Configuration.
The @ComponentScan annotation includes a parameter, basePackages, that allows us to specify a package name as a String that Spring will search, recursively, to find @Component classes. In the case our example, the package is com.dzone.albanoj2.spring.di.domain, and therefore, our resulting @Configuration class is:
xxxxxxxxxx
(basePackages = "com.dzone.albanoj2.spring.di.domain")
public class AutomatedAnnotationConfig {}
The basePackages parameter is actually the default parameter, so we can abbreviate our @ComponentScan definition by removing the explicit basePackages parameter name:
xxxxxxxxxx
("com.dzone.albanoj2.spring.di.domain")
public class AutomatedAnnotationConfig {}
The @ComponentScan annotation also includes a basePackageClasses parameter that can be used instead of the basePackages parameter. The basePackageClasses allows us to specify a class, which Spring will assume is contained in the base package that should be searched. For example, if we provide Car.class as an argument, then Spring will consider the package containing the Car class as the basePackage to be searched.
This approach is useful, especially during development, where package names and locations may change and automatically updating a String-based package name within in the @ComponentScan annotation could be difficult. Using the basePackageClasses approach, we obtain the following @Configuration class:
xxxxxxxxxx
(basePackageClasses = Car.class)
public class AutomatedAnnotationConfig {}
It is important to note that both the basePackages and basePackageClasses parameters can accept more than one value using the array notation for an annotation parameter. For example, both of the following @ComponentScan definitions are valid:
xxxxxxxxxx
(basePackages = {"a.b.c", "x.y.z"})
(basePackageClasses = {Abc.class, Xyz.class})
Executing our application is nearly identical to the basic Java-based configuration approach, but instead, we pass our new AutomatedAnnotationConfig class to the AnnotationConfigApplicationContext constructor when instantiating our ApplicationContext:
xxxxxxxxxx
ApplicationContext context =
new AnnotationConfigApplicationContext(AutomatedAnnotationConfig.class);
Car car = context.getBean(Car.class);
car.start();
Executing this snippet, we see that our application runs as expected:
xxxxxxxxxx
Started combustion engine
Although we have reached the same behavior as the basic Java-based configuration route, there are two major benefits to the automated Java-based configuration approach:
- The required configuration is much more concise.
- The annotations are applied directly to the classes, not in a
@Configurationclass.
To the last point, instead of repeating the creation logic for a bean in a @Configuration class, we now directly annotate the classes we wish to have Spring manage. This is an important distinction from the basic approach, since we may not have control over the @Configuration class registered with Spring, but we do have control over the classes we write. Additionally, we do not need to arbitrarily create a new @Bean method for every @Component class we create, thus reducing duplication and the possibility of mistakes during replication. In general, the automated approach should be preferred, unless there is a specific need to use another approach.
Field Injection
Apart from instructing Spring to autowire dependencies through constructors, we can also instruct Spring to directly autowire dependencies into the fields of our class. We can accomplish this by simply applying the @Autowired annotation to the desired fields:
xxxxxxxxxx
public class Car {
private Engine engine;
public void start() {
engine.turnOn();
}
}
This approach greatly reduces the amount of code we write, but it also removes our ability to manipulate the autowired object before assigning it to the desired field. For example, we would be unable to check that the autowired object is not null before assignment using field injection.
Additionally, the use of field injection hides the fact that a class may be overburdened. In many cases, a class may be poorly designed and have dozens of autowired fields. Since there is no burden to the developer, we are often unaware of the fragile nature of the class. If we used constructor injection, on the other hand, we would become acutely aware of the number of arguments our constructor is required to have to support a large number of fields.
This is more of a pragmatic issue, rather than a technical issue, since using field injection is just as a valid of a Spring mechanism as constructor injection; but we should consider bringing poor design decisions to the forefront when possible. Although field injection is one of the most common autowiring mechanisms used in practice, constructor injection should be preferred since it is more versatile and allows for a class to be autowired or directly instantiated —i.e., using new, as is done in many test cases.
Setter Injection
The last alternative to constructor injection is setter injection, where the @Autowired annotation is applied to the setter associated with a field. For example, we can change our Car class to obtain an Engine object through setter injection by annotating the setEngine method with @Autowired:
xxxxxxxxxx
public class Car {
private Engine engine;
public void start() {
engine.turnOn();
}
public Engine getEngine() {
return engine;
}
public void setEngine(Engine engine) {
this.engine = engine;
}
}
Setter injection is similar to field injection, but it allows us to interact with the autowired object. There are cases where setter injection can be especially useful—such as with circular dependencies—but setter injection is likely the least common of the three injection techniques to be encountered and constructor injection should be preferred when possible.
XML-Based Configuration
Another configuration approach — usually found in legacy applications — is XML-based configuration. Using this route, we define our beans, and the relationships between them, in XML configuration files and then instruct Spring where to find our configuration files.
The first step to configuring the application is to define our beans. To do this, we follow the same steps as the basic Java-based configuration but using the XML <bean> element instead. In the XML case, we must also explicitly state which beans we intend to inject into other constructors using the <constructor-arg> element. Combining the <bean> and <constructor-arg> elements, we obtain the following XML configuration:
xxxxxxxxxx
<beans xmlns="http://www.springframework.org/schema/beans"
xmlns:xsi="http://www.w3.org/2001/XMLSchema-instance"
xmlns:util="http://www.springframework.org/schema/util"
xsi:schemaLocation="
http://www.springframework.org/schema/beans
http://www.springframework.org/schema/beans/spring-beans.xsd
http://www.springframework.org/schema/util
http://www.springframework.org/schema/util/spring-util.xsd">
<bean id="car" class="com.dzone.albanoj2.spring.di.domain.Car">
<constructor-arg ref="engine" />
</bean>
<bean id="engine" class="com.dzone.albanoj2.spring.di.domain.CombustionEngine">
<constructor-arg ref="camshaft" />
<constructor-arg ref="crankshaft" />
</bean>
<bean id="camshaft" class="com.dzone.albanoj2.spring.di.domain.Camshaft" />
<bean id="crankshaft" class="com.dzone.albanoj2.spring.di.domain.Crankshaft" />
</beans>
In the <bean> element, we must specify two attributes:
id: A unique ID for the bean—equivalent to the@Beanmethod nameclass: The fully qualified name (including package name) of the class
For the <constructor-arg> element, we are only required to specify the ref attribute, which is a reference to an existing bean ID. For example, the element <constructor-arg ref="engine" /> states that the bean with ID engine—defined directly below the car bean—should be used as the bean injected into the constructor of the car bean.
The order of the constructor arguments is determined by the order of the <constructor-arg> elements. For example, when defining the engine bean, the first constructor argument passed to the CombustionEngine constructor is the camshaft bean, while the second argument is the crankshaft bean.
As with the automated Java-based configuration, we simply modify our ApplicationContext implementation type to reflect our XML-based configuration. Since we putting our XML configuration file on the classpath, we use ClassPathXmlApplicationContext:
xxxxxxxxxx
ApplicationContext context =
new ClassPathXmlApplicationContext("basic-config.xml");
Car car = context.getBean(Car.class);
car.start();
Executing this snippet, we receive the same output as our basic and automated Java-based configuration approaches:
xxxxxxxxxx
Started combustion engine
Common Problems
At this point, we have all of the tools necessary to create a Spring-based application and properly inject all of the dependencies in our application, but we have delayed dealing with two major problems: (1) Having multiple components that satisfy a dependency and (2) circular dependencies.
Multiple Eligible Classes
Until now, we have postponed mentioning the ElectricEngine class in our configurations. In both the Java-based and XML-based approaches, we have instructed Spring to only use the CombustionEngine as our Engine implementation. What would happen if we registered the ElectricEngine as a DI-eligible component? To test out the result, we will modify our automated Java-based configuration example and annotate the ElectricEngine class with @Component:
xxxxxxxxxx
public class ElectricEngine implements Engine {
public void turnOn() {
System.out.println("Started electric engine");
}
}
If we rerun our automated Java-based configuration application, we see the following error:
xxxxxxxxxx
Exception in thread "main" org.springframework.beans.factory.UnsatisfiedDependencyException: Error creating bean with name 'car' defined in file [C:\Users\alban\eclipse-workspace\spring-di-example\target\classes\com\dzone\albanoj2\spring\di\domain\Car.class]: Unsatisfied dependency expressed through constructor parameter 0; nested exception is org.springframework.beans.factory.NoUniqueBeanDefinitionException: No qualifying bean of type 'com.dzone.albanoj2.spring.di.domain.Engine' available: expected single matching bean but found 2: combustionEngine,electricEngine
Since we have annotated two classes that implement the Engine interface with @Component—namely, CombustionEngine and ElectricEngine—Spring is now unable to determine which of the two classes should be used to satisfy the Engine dependency when instantiating a Car object. To resolve this issue, we have to explicitly instruct Spring which of the two beans to use.
@Qualifier Annotation
One approach is to name our component and use the @Qualifier annotation where the @Autowired annotation is applied. As the name implies, the @Qualifier annotation qualifies the bean that the is autowired, reducing the number of beans that meet the desired criteria—eventually to one. For example, we can name our CombustionEngine default:
xxxxxxxxxx
("defaultEngine")
public class CombustionEngine implements Engine {
// ...existing implementation unchanged...
}
Then we can add a @Qualifier annotation—whose name matches our desired component name (default)—where our Engine object is autowired in the Car constructor:
xxxxxxxxxx
public class Car {
public Car(("defaultEngine") Engine engine) {
this.engine = engine;
}
// ...existing implementation unchanged...
}
If we rerun our application, we no longer receive the previous error:
xxxxxxxxxx
Started combustion engine
While this may appear that we are back to our original problem of explicitly declaring that our Car class should use the CombustionEngine, there is an important difference. In the original case, we explicitly stated that the CombustionEngine is the only Engine implementation we could use, but in the @Qualifier case, we are stating that any class that has a @Component name of defaultEngine will suffice. This allows us, at some future time, to change the name of the CombustionEngine @Component annotation to another name—or remove an explicit name entirely—and rename another implementation as defaultEngine.
For example, we can change our CombustionEngine and ElectricEngine classes to the following:
xxxxxxxxxx
("legacyEngine")
public class CombustionEngine implements Engine {
// ...existing implementation unchanged...
}
("defaultEngine")
public class ElectricEngine implements Engine {
// ...existing implementation unchanged...
}
If we keep our Car class unchanged and rerun our application, we see the following output:
xxxxxxxxxx
Started electric engine
Note that all classes that do not have explicit component names have a default component name that matches the class name of the component in lower-camelcase. For example, the default component name of our CombustionEngine class is combustionEngine—as seen in the error output above. For more information, see the documentation for the AnnotationBeanNameGenerator class.
@Primary Annotation
If we know that we favor one implementation over another by default, we can forego the @Qualifier annotation and add the @Primary annotation directly to a class. For example, we can change our CombustionEngine, ElectricEngine, and Car classes to the following:
xxxxxxxxxx
public class CombustionEngine implements Engine {
// ...existing implementation unchanged...
}
public class ElectricEngine implements Engine {
// ...existing implementation unchanged...
}
public class Car {
public Car(Engine engine) {
this.engine = engine;
}
// ...existing implementation unchanged...
}
If we rerun our application, we receive the following output:
xxxxxxxxxx
Started combustion engine
This proves that although there are two possibilities that satisfy the Engine dependency—namely CombustionEngine and ElectricEngine—Spring was able to decide which of the two implementations should be favored based on the @Primary annotation.
Cyclic Dependencies
Although we have covered the basics of Spring DI in-depth, we have left one major issue unresolved: What happens if our dependency tree has a circular reference? For example, suppose that we create a Foo class whose constructor requires a Bar object, but the Bar constructor requires a Foo object.

We can port this to Spring-based code using the following class definitions:
xxxxxxxxxx
public class Foo {
private Bar bar;
public Foo(Bar bar) {
this.bar = bar;
}
}
public class Bar {
private Foo foo;
public Bar(Foo foo) {
this.foo = foo;
}
}
We can then define the following configuration:
xxxxxxxxxx
(basePackageClasses = Foo.class)
public class Config {}
Lastly, we can create our ApplicationContext:
xxxxxxxxxx
ApplicationContext context =
new AnnotationConfigApplicationContext(Config.class);
Foo foo = context.getBean(Foo.class);
When we execute this snippet, we see the following error:
xxxxxxxxxx
Exception in thread "main" org.springframework.beans.factory.UnsatisfiedDependencyException: Error creating bean with name 'bar' defined in file [C:\Users\alban\eclipse-workspace\spring-di-example\target\classes\com\dzone\albanoj2\spring\di\domain\cycle\Bar.class]: Unsatisfied dependency expressed through constructor parameter 0; nested exception is org.springframework.beans.factory.UnsatisfiedDependencyException: Error creating bean with name 'foo' defined in file [C:\Users\alban\eclipse-workspace\spring-di-example\target\classes\com\dzone\albanoj2\spring\di\domain\cycle\Foo.class]: Unsatisfied dependency expressed through constructor parameter 0; nested exception is org.springframework.beans.factory.BeanCurrentlyInCreationException: Error creating bean with name 'bar': Requested bean is currently in creation: Is there an unresolvable circular reference?
First, Spring attempts to create the Foo object. During this process, Spring recognizes that a Bar object is required. In order to construct the Bar object, a Foo object is needed. Since the Foo object is currently under construction—the original reason a Bar object was being created—Spring recognizes that a circular reference may have occurred.
One of the simplest solutions to this problem is to use the @Lazy annotation on one of the classes and at the point of injection. This instructs Spring to defer the initialization of the annotated bean and the annotated @Autowired location. This allows one of the beans to be successfully initialized, thus breaking the circular dependency chain. Understanding this, we can change our Foo and Bar classes:
xxxxxxxxxx
public class Foo {
private Bar bar;
public Foo( Bar bar) {
this.bar = bar;
}
}
public class Bar {
public Bar(Foo foo) {}
}
If we rerun our application with our @Lazy annotations, no error is reported.
Conclusion
In this article, we explored the fundamentals of Spring, including IoC, DI, and the Spring ApplicationContext. We then worked through the basics of creating a Spring application using Java-based configurations and XML-based configurations, while examining some of the common pitfalls that we may experience using Spring DI. Although these concepts may at first appear abstract and disconnected from Spring code, having an intuitive understanding of Spring at its most basic level will go a long way in improving designs, reducing implementation time, and easing debugging woes, which ultimately leads to higher quality applications.
Opinions expressed by DZone contributors are their own.
Comments